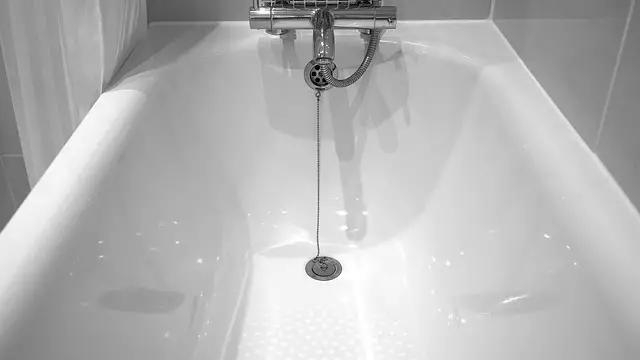
Walk-in showers have been popular as they give a sleeker look to your bathroom. If your bathroom has a walk-in shower, it probably also has a shower pan. The floor of a walk-in shower usually consists of a shower pan. A shower pan is usually made of fiberglass or acrylic. It acts as a shallow tub on the floor of your shower to contain water. Heavy objects like shampoo bottles dropped on the shower pans can cause it to crack and break. Cracks in the pan can cause water to leak into the space between the shower pan and the floor. Incorrectly installed shower pans can also cause leaks in them. Such leaks can cause fixtures rust, rotting, and other more severe damages. Sometimes the shower pan is too old and dirty to be used longer. It is best to replace the shower pan in such situations. You should be able to replace shower pans easily. In most cases, you can remove them without disturbing the tiles on your wall.
Also, Read – Best fiberglass shower cleaner
But if there is an overlap between the tiles and the pan, you will need some rebuilding. It is best to be prepared for redoing at least the lowest layer of the tiling. If your shower has acrylic walls, replacing the shower pan without disturbing the walls is not possible.
How to replace a shower pan without removing the tiles

While it is possible to replace shower pans, it is not always advisable. However, anyone with some basic plumbing skills should manage it. Remember that replacing a shower pan will take at least a couple of days. You can follow these steps to replace your shower pan –
Things You’ll Need
- Hammer
- Crowbar or Pry Bar
- Screwdriver
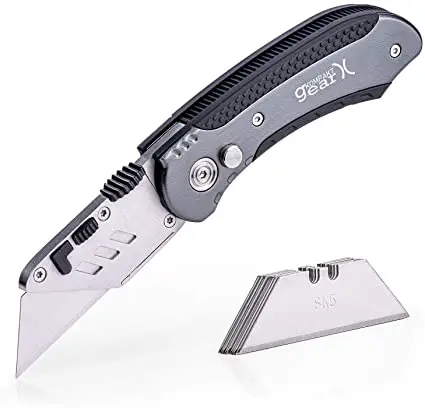
- Utility Knife
- Pliers
- Reciprocating Saw
Step 1 – Opening Up the Wall
In showers with tile walls, the shower pan mostly starts right where the tile ends. These are easier to replace without messing up the entire shower wall. The best way to go about it would be to remove the first layer of the tiles. If done slowly and carefully, you can remove the tiles without cracking them. Then using a hammer and the flat end of the crowbar, pull the drywall layer. Once this is done, you should see the “lip” of the shower pan. The lip is the top inch or so of the pan fastened to the wall with screws. The wall tiles are then placed over this to hide the fasteners.
Step 2 – Cleaning up Debris
If you had to remove the lower row of the tile and any drywall, it likely left behind a mess. It is best to clean up any of the debris immediately. Sharp edges of the tiles are dangerous and could cause serious injury. Tripping over mounds of rubble is also hazardous. Quick clean-ups also ensure a clean and safe working space.
Step 3 – Unscrewing the Shower Pan

Once you have access to the top edge of the shower pan, you should be able to see how it’s fixed to the wall. First, use your screwdriver to remove any screws attaching the shower pan to the wall. Next, use pliers to remove any nails you may have used for reinforcement.
Step 4 – Loosening the Shower Pan

Once all the screws and other fasteners have been removed, you may need to pry the shower pan off the wall. Push your utility knife in the gap between the shower pan and the wall and cut it away from the wall. Once the gap is wider, push the pry bar into it and increase the pressure until you feel the shower pan pull away from the wall.
Step 5 – Detaching the Drain Pipe
Before pulling out the entire shower pan, don’t forget to detach the drain pipe from the bottom. Some drains need to be unscrewed from the top before removal. Check if your drain top is screwed on; unscrew with a screwdriver if it is.
Remove the drain cover and then the rubber gasket under it to detach your drainpipe. You can use a utility knife at this point to make sure the drain is fully separated from the shower pan. Next, insert the knife between the rubber gasket and the shower base and run it around a few times. Once the pipe is removed from the shower pan, you can lift it out.
Step 6 – Replacing the Shower Pan
Slowly lift it from the base after detaching the shower pan and the drainpipe. If it gets stuck, try lifting at an angle or twisting it slightly. Bring it upwards over the drainpipe before removing it from the stall. You can use a screwdriver to hold the pipe down if it starts rising with the shower base. Turning it sideways will help you quickly get it out of the shower stall.
Once you have removed the old shower pan, clear out the floor. Vacuuming the space will get rid of any leftover debris. Once you clear the floor, you can fit in your new shower pan! If required, make repairs on the floor before installing a new shower pan to avoid further issues.
Wrapping Up
With a little bit of patience and a couple of days to spare, you can replace your shower pan. But, it is a tedious job and should be taken up only if necessary. You can remove and replace most shower bases with minimal damage to the tiles. But, removing a shower pan without touching any of the lower tiles is unlikely. If you spot signs of more severe repairs, call a professional to help.